
Reactで開発を進めていると、「複数のコンポーネントで同じ値を共有したい」「propsの受け渡しが煩雑になってきた」と感じる場面は少なくありません。こうした課題に直面したときに注目されるのが「グローバル変数(グローバル状態)」の活用です。ただし、JavaScriptのように何でもグローバルに置けば良いという話ではなく、ReactにはReactなりの“正しいやり方”があります。
特に初心者の方にとっては、useContextやuseStateの使い方、windowとの使い分け、TypeScriptとの併用など、選択肢が多すぎて戸惑うこともあるかもしれません。本記事では、グローバル変数を安全かつ効率的に扱うための基本と実践的な方法を、段階を追ってわかりやすく解説していきます。
この記事を読めば、Reactの状態管理における「最適なグローバル変数の扱い方」がきっと見つかるはずです。では、さっそく見ていきましょう。
Reactでグローバル変数が必要になる場面と基本概念
React開発において「グローバル変数」という言葉を聞くと、多くの開発者が混乱するかもしれません。従来のプログラミング言語におけるグローバル変数の概念とは異なり、Reactではグローバル状態管理という形でアプローチする必要があります。このセクションでは、なぜReactでグローバル変数が必要になるのか、そしてその適切な管理方法について基本から解説していきます。

Reactにおける「グローバル変数」の概念とは?なぜ避けられる?
通常のグローバル変数とReactの相性問題
通常のプログラミング言語では、グローバル変数はアプリケーション全体のどこからでもアクセス可能な変数として定義されます。例えば、JavaScriptでは以下のような形で宣言できます:
// 従来のJavaScriptでのグローバル変数
let userName = "田中太郎";
let isLoggedIn = false;

function updateUserName(newName) {
  userName = newName;
}しかし、Reactのコンポーネント指向アーキテクチャでは、このような直接的なグローバル変数の使用は強く非推奨とされています。その理由は以下の通りです:
Reactでグローバル変数がアンチパターンとされる理由
1. データの追跡困難性
Reactでは、コンポーネントの状態変化が明確に追跡できることが重要です。従来のグローバル変数を使用すると、「どのコンポーネントがいつデータを変更したのか」が不明になり、デバッグが困難になります。
// アンチパターンの例
let globalCounter = 0;

function ComponentA() {
  const handleClick = () => {
    globalCounter++; // どこで変更されたかわからない
  };

  return <button onClick={handleClick}>カウント: {globalCounter}</button>;
}
2. 意図しない副作用の発生
グローバル変数は複数のコンポーネントから同時に参照・変更される可能性があります。これにより、一つのコンポーネントでの変更が他のコンポーネントに予期しない影響を与える可能性があります。
3. コンポーネントの再利用性低下
グローバル変数に依存するコンポーネントは、そのグローバル変数が存在する環境でしか動作しません。これにより、コンポーネントの独立性と再利用性が大幅に低下します。
4. テストの困難さ
グローバル変数を使用するコンポーネントのテストは、グローバル状態の初期化や管理が必要になり、テストの複雑さが増大します。
5. React の仮想DOM更新機能との不整合
Reactは状態の変化を検知してコンポーネントを再レンダリングしますが、通常のグローバル変数の変更はReactが検知できないため、UIが正しく更新されない問題が発生します。
ローカルstate・propsバケツリレーでは解決できない課題
ローカル状態管理とpropsの有効性
Reactの基本的な状態管理はuseStateによるローカル状態管理と、propsによるデータの受け渡しです。これらは以下のようなケースで非常に有効です:
// 効果的なローカル状態管理の例
function TodoItem({ todo }) {
  const [isEditing, setIsEditing] = useState(false);
  const [editText, setEditText] = useState(todo.text);

  return (
    <div>
      {isEditing ? (
        <input
          value={editText}
          onChange={(e) => setEditText(e.target.value)}
        />
      ) : (
        <span>{todo.text}</span>
      )}
    </div>
  );
}
大規模アプリケーションでの限界
しかし、アプリケーションが大規模化すると、以下のような課題が顕在化します:
1. 深い階層でのpropsバケツリレー問題
// propsバケツリレーの例(アンチパターン)
function App() {
  const [user, setUser] = useState(null);

  return <Header user={user} setUser={setUser} />;
}

function Header({ user, setUser }) {
  return <Navigation user={user} setUser={setUser} />;
}

function Navigation({ user, setUser }) {
  return <UserProfile user={user} setUser={setUser} />;
}

function UserProfile({ user, setUser }) {
  return <UserMenu user={user} setUser={setUser} />;
}

function UserMenu({ user, setUser }) {
  // ここでようやく使用
  return <div>ようこそ、{user?.name}さん</div>;
}
この例では、userとsetUserが5階層もの深さを通過しており、中間のコンポーネント(Header、Navigation、UserProfile)は実際にはこれらのpropsを使用していません。
2. 多数のコンポーネントでの状態共有
ショッピングサイトのカート機能を考えてみましょう:
// 複数箇所でカートデータが必要な例
function ProductList() {
  // カート内商品数の表示が必要
}

function ProductCard() {
  // 「カートに追加」ボタンでカート更新が必要
}

function Header() {
  // カート内商品数の表示が必要
}

function CartSidebar() {
  // カート内容の表示・編集が必要
}

function CheckoutPage() {
  // カート内容の確認が必要
}
これらすべてのコンポーネントがカートデータにアクセスする必要がある場合、propsによる受け渡しは非現実的になります。
3. パフォーマンスの劣化
propsバケツリレーは、データを使用しない中間コンポーネントも不必要に再レンダリングを引き起こす可能性があります。これは特に大規模なアプリケーションでパフォーマンス問題となります。
グローバル変数(状態)の典型的な活用例とスコープ設計
グローバル状態として管理すべきデータの典型例
React アプリケーションで「グローバル状態」として管理するべきデータには、以下のような特徴があります:
1. ユーザー認証情報
const userAuthState = {
  user: {
    id: 1,
    name: "田中太郎",
    email: "tanaka@example.com",
    role: "admin"
  },
  isAuthenticated: true,
  token: "jwt_token_here"
};
理由: ログイン状態はアプリケーション全体で参照され、ヘッダー、サイドバー、各ページのアクセス制御など多くのコンポーネントで必要になるため。
2. アプリケーションテーマ設定
const themeState = {
  mode: "dark", // "light" | "dark"
  primaryColor: "#3b82f6",
  fontSize: "medium"
};
理由: テーマ設定は全てのUIコンポーネントに影響を与え、ユーザーがいつでも変更できる設定であるため。
3. 多言語対応(国際化)設定
const i18nState = {
  currentLanguage: "ja",
  translations: {
    "welcome": "ようこそ",
    "login": "ログイン",
    "logout": "ログアウト"
  }
};
理由: 言語設定はアプリケーション全体のテキスト表示に影響し、多数のコンポーネントで翻訳テキストの取得が必要になるため。
4. ショッピングカート・お気に入りデータ
const cartState = {
  items: [
    { id: 1, name: "商品A", price: 1000, quantity: 2 },
    { id: 2, name: "商品B", price: 2000, quantity: 1 }
  ],
  totalAmount: 4000,
  totalItems: 3
};
理由: カート情報は商品一覧、商品詳細、ヘッダー、チェックアウトページなど複数の場所で参照・更新が必要になるため。
5. アプリケーション全体のエラー・通知メッセージ
const notificationState = {
  messages: [
    { id: 1, type: "success", text: "保存が完了しました", timestamp: Date.now() },
    { id: 2, type: "error", text: "ネットワークエラーが発生しました", timestamp: Date.now() }
  ]
};
理由: エラーや成功メッセージは任意のコンポーネントから発生し、画面上部のトースト通知エリアなどで一元表示する必要があるため。
6. アプリケーション設定・環境情報
const appConfigState = {
  apiBaseUrl: "<https://api.example.com>",
  features: {
    betaFeatures: true,
    experimentalUI: false
  },
  version: "1.2.3"
};
理由: アプリケーション設定は多くのコンポーネントで参照される可能性があり、環境や機能フラグの管理に必要になるため。
スコープ設計の重要性
グローバル状態を効果的に管理するには、適切なスコープ設計が不可欠です:
1. アプリケーションレベル vs 機能レベル
全てのデータをアプリケーション全体のグローバル状態にする必要はありません。例えば:
- アプリケーションレベル: ユーザー認証、テーマ、言語設定
- 機能レベル: 特定の機能群内でのみ共有される状態(例:商品検索フィルター状態)
2. 読み取り専用 vs 読み書き可能
グローバル状態の中でも、更新頻度や更新権限によって設計を分ける必要があります:
- 読み取り専用: 設定情報、マスターデータ
- 読み書き可能: ユーザーデータ、カート情報
3. 永続化の必要性
データの性質に応じて、ブラウザのローカルストレージやセッションストレージとの連携を考慮します:
- 永続化必要: ユーザー設定、認証トークン
- セッション限定: 一時的な状態、フォーム入力中のデータ
このような適切なスコープ設計により、Reactアプリケーションの保守性とパフォーマンスを両立させることができます。次のセクションでは、これらのグローバル状態を実際に管理するための具体的な手法について詳しく解説していきます。

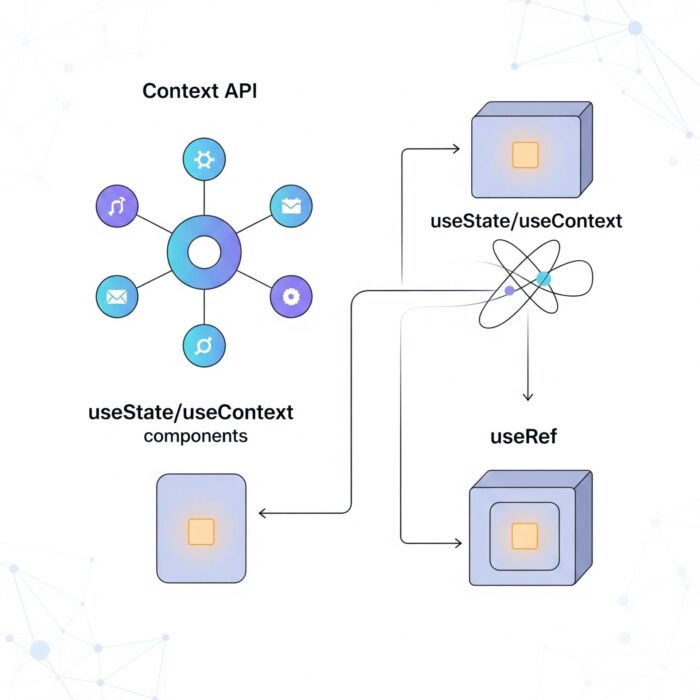
【初心者向け】Reactでグローバル状態を管理する3つの基本手法
前のセクションでReactにおけるグローバル変数の概念と必要性を理解したところで、実際にどのようにグローバル状態を管理するかを学んでいきましょう。ここでは、React開発初心者でも理解しやすい3つの基本手法を、具体的なコード例とともに詳しく解説します。
Context APIの基本:React.createContextとuseContextの使い方
Context APIとは何か?
Context APIは、Reactが公式に提供するグローバル状態管理機能です。propsのバケツリレーを解決し、コンポーネントツリーのどの階層からでも直接データにアクセスできるようにします。Context APIは「データの提供者(Provider)」と「データの消費者(Consumer)」という概念で構成されています。
Context APIの基本的な仕組み
Context APIを使用するには、以下の3つのステップが必要です:
createContextでコンテキストを作成Providerでデータを提供useContextでデータを使用
ステップ1: コンテキストの作成
まず、React.createContextを使用してコンテキストを作成します:
import React, { createContext } from 'react';

// ユーザー情報用のコンテキストを作成
const UserContext = createContext();

// 初期値を設定することも可能
const UserContextWithDefault = createContext({
  user: null,
  isLoggedIn: false
});
ステップ2: Providerでデータを提供
作成したコンテキストのProviderを使用して、子コンポーネントにデータを提供します:
import React, { createContext, useState } from 'react';

const UserContext = createContext();

function App() {
  const [user, setUser] = useState({
    id: 1,
    name: "田中太郎",
    email: "tanaka@example.com"
  });

  const [isLoggedIn, setIsLoggedIn] = useState(true);

  // Providerのvalueに渡すオブジェクト
  const userContextValue = {
    user,
    isLoggedIn,
    setUser,
    setIsLoggedIn
  };

  return (
    <UserContext.Provider value={userContextValue}>
      <Header />
      <MainContent />
      <Footer />
    </UserContext.Provider>
  );
}
ステップ3: useContextでデータを使用
子コンポーネントでは、useContextフックを使用してデータにアクセスします:
import React, { useContext } from 'react';

function Header() {
  const { user, isLoggedIn, setIsLoggedIn } = useContext(UserContext);

  const handleLogout = () => {
    setIsLoggedIn(false);
  };

  return (
    <header>
      {isLoggedIn ? (
        <div>
          <span>ようこそ、{user.name}さん</span>
          <button onClick={handleLogout}>ログアウト</button>
        </div>
      ) : (
        <div>
          <button>ログイン</button>
        </div>
      )}
    </header>
  );
}

function MainContent() {
  const { user, isLoggedIn } = useContext(UserContext);

  return (
    <main>
      {isLoggedIn ? (
        <div>
          <h1>{user.name}さんのダッシュボード</h1>
          <p>メール: {user.email}</p>
        </div>
      ) : (
        <div>
          <h1>ログインしてください</h1>
        </div>
      )}
    </main>
  );
}
Context APIが適しているユースケース
Context APIは以下のような場面で特に効果を発揮します:
1. 頻繁に更新されないデータ
- ユーザー認証情報
- アプリケーションテーマ設定
- 言語・地域設定
- アプリケーション設定情報
2. Propsのバケツリレー解消
深い階層のコンポーネントにデータを渡す必要がある場合、中間のコンポーネントを通さずに直接アクセスできます。
3. 小〜中規模のアプリケーション
複雑な状態更新ロジックが不要で、シンプルなデータ共有が目的の場合に適しています。
useStateとuseContextを活用したグローバル変数管理パターン
状態更新を伴うグローバル変数管理の課題
Context API単体では、データの提供と取得はできますが、複雑な状態更新ロジックを効率的に管理するには限界があります。この問題を解決するため、useStateとuseContextを組み合わせたパターンが広く使用されています。
カスタムフックによるグローバル状態管理
以下は、ショッピングカート機能を例にした実践的な実装例です:
import React, { createContext, useContext, useState } from 'react';

// カートコンテキストの作成
const CartContext = createContext();

// カスタムフック:useCartを作成
export function useCart() {
  const context = useContext(CartContext);
  if (!context) {
    throw new Error('useCartはCartProvider内で使用してください');
  }
  return context;
}

// CartProviderコンポーネント
export function CartProvider({ children }) {
  const [cartItems, setCartItems] = useState([]);

  // カートに商品を追加する関数
  const addToCart = (product) => {
    setCartItems(prevItems => {
      const existingItem = prevItems.find(item => item.id === product.id);

      if (existingItem) {
        // 既存商品の数量を増やす
        return prevItems.map(item =>
          item.id === product.id
            ? { ...item, quantity: item.quantity + 1 }
            : item
        );
      } else {
        // 新しい商品を追加
        return [...prevItems, { ...product, quantity: 1 }];
      }
    });
  };

  // カートから商品を削除する関数
  const removeFromCart = (productId) => {
    setCartItems(prevItems =>
      prevItems.filter(item => item.id !== productId)
    );
  };

  // 商品の数量を更新する関数
  const updateQuantity = (productId, newQuantity) => {
    if (newQuantity <= 0) {
      removeFromCart(productId);
      return;
    }

    setCartItems(prevItems =>
      prevItems.map(item =>
        item.id === productId
          ? { ...item, quantity: newQuantity }
          : item
      )
    );
  };

  // カートをクリアする関数
  const clearCart = () => {
    setCartItems([]);
  };

  // 合計金額を計算
  const totalAmount = cartItems.reduce(
    (total, item) => total + (item.price * item.quantity),
    0
  );

  // 合計商品数を計算
  const totalItems = cartItems.reduce(
    (total, item) => total + item.quantity,
    0
  );

  const value = {
    cartItems,
    addToCart,
    removeFromCart,
    updateQuantity,
    clearCart,
    totalAmount,
    totalItems
  };

  return (
    <CartContext.Provider value={value}>
      {children}
    </CartContext.Provider>
  );
}
カスタムフックを使用したコンポーネント
// 商品カードコンポーネント
function ProductCard({ product }) {
  const { addToCart } = useCart();

  const handleAddToCart = () => {
    addToCart(product);
  };

  return (
    <div className="product-card">
      <h3>{product.name}</h3>
      <p>価格: ¥{product.price.toLocaleString()}</p>
      <button onClick={handleAddToCart}>
        カートに追加
      </button>
    </div>
  );
}

// ヘッダーのカート表示コンポーネント
function CartIcon() {
  const { totalItems, totalAmount } = useCart();

  return (
    <div className="cart-icon">
      <span>🛒 {totalItems}点</span>
      <span>¥{totalAmount.toLocaleString()}</span>
    </div>
  );
}

// カートサイドバーコンポーネント
function CartSidebar() {
  const { cartItems, updateQuantity, removeFromCart, clearCart } = useCart();

  return (
    <div className="cart-sidebar">
      <h2>ショッピングカート</h2>
      {cartItems.length === 0 ? (
        <p>カートは空です</p>
      ) : (
        <>
          {cartItems.map(item => (
            <div key={item.id} className="cart-item">
              <h4>{item.name}</h4>
              <p>価格: ¥{item.price.toLocaleString()}</p>
              <div>
                <button
                  onClick={() => updateQuantity(item.id, item.quantity - 1)}
                >
                  -
                </button>
                <span>数量: {item.quantity}</span>
                <button
                  onClick={() => updateQuantity(item.id, item.quantity + 1)}
                >
                  +
                </button>
              </div>
              <button onClick={() => removeFromCart(item.id)}>
                削除
              </button>
            </div>
          ))}
          <button onClick={clearCart}>カートをクリア</button>
        </>
      )}
    </div>
  );
}
アプリケーション全体での使用
function App() {
  return (
    <CartProvider>
      <div className="app">
        <header>
          <h1>ECサイト</h1>
          <CartIcon />
        </header>
        <main>
          <ProductList />
          <CartSidebar />
        </main>
      </div>
    </CartProvider>
  );
}
このパターンのメリット
- カプセル化: ビジネスロジックがカスタムフック内に集約される
- 再利用性:
useCartフックは任意のコンポーネントで使用可能 - 型安全性: TypeScriptと組み合わせやすい
- テスタビリティ: カスタムフック単体でのテストが可能
関数コンポーネント内で変数を保持する方法と注意点
useRefフックによる値の保持
useRefフックは、DOM要素への参照だけでなく、再レンダリング時に値が変わらない可変な値を保持する用途にも使用できます。これは、特定の状況下でグローバル変数のような役割を果たすことができます。
useRefの基本的な使い方
import React, { useRef, useState, useEffect } from 'react';

function TimerComponent() {
  const [count, setCount] = useState(0);
  const [isRunning, setIsRunning] = useState(false);

  // タイマーIDを保持するためのref
  const timerIdRef = useRef(null);

  // 前回のカウント値を保持するためのref
  const prevCountRef = useRef(0);

  const startTimer = () => {
    if (!isRunning) {
      setIsRunning(true);
      timerIdRef.current = setInterval(() => {
        setCount(prevCount => prevCount + 1);
      }, 1000);
    }
  };

  const stopTimer = () => {
    if (isRunning && timerIdRef.current) {
      clearInterval(timerIdRef.current);
      timerIdRef.current = null;
      setIsRunning(false);
    }
  };

  const resetTimer = () => {
    stopTimer();
    setCount(0);
  };

  // 前回の値を記録
  useEffect(() => {
    prevCountRef.current = count;
  });

  return (
    <div>
      <h2>タイマー: {count}秒</h2>
      <p>前回の値: {prevCountRef.current}</p>
      <button onClick={startTimer} disabled={isRunning}>
        開始
      </button>
      <button onClick={stopTimer} disabled={!isRunning}>
        停止
      </button>
      <button onClick={resetTimer}>
        リセット
      </button>
    </div>
  );
}
useRefのライフサイクルと特徴
useRefで作成された値は以下の特徴を持ちます:
1. コンポーネントのライフサイクル全体で値を保持
function PersistentCounter() {
  const [renderCount, setRenderCount] = useState(0);
  const totalClicksRef = useRef(0);

  const handleClick = () => {
    totalClicksRef.current += 1;
    setRenderCount(prev => prev + 1); // 再レンダリングを引き起こす
  };

  return (
    <div>
      <p>レンダリング回数: {renderCount}</p>
      <p>累計クリック数: {totalClicksRef.current}</p>
      <button onClick={handleClick}>クリック</button>
    </div>
  );
}
2. 値の変更では再レンダリングが発生しない
function NoReRenderExample() {
  const countRef = useRef(0);
  const [displayCount, setDisplayCount] = useState(0);

  const incrementRef = () => {
    countRef.current += 1;
    // この時点では画面は更新されない
    console.log('Ref count:', countRef.current);
  };

  const showRefValue = () => {
    setDisplayCount(countRef.current);
    // この時点で画面が更新される
  };

  return (
    <div>
      <p>表示カウント: {displayCount}</p>
      <button onClick={incrementRef}>Refをインクリメント</button>
      <button onClick={showRefValue}>Ref値を表示</button>
    </div>
  );
}
useRefが適用できるグローバル変数的なケース
1. 一度だけ初期化したい値
function ExpensiveInitialization() {
  const expensiveValueRef = useRef(null);

  // 初回レンダリング時のみ実行
  if (expensiveValueRef.current === null) {
    expensiveValueRef.current = performExpensiveCalculation();
  }

  return <div>結果: {expensiveValueRef.current}</div>;
}

function performExpensiveCalculation() {
  console.log('重い処理を実行中...');
  return Math.random() * 1000;
}
2. イベントリスナーやタイマーの管理
function ScrollTracker() {
  const [scrollPosition, setScrollPosition] = useState(0);
  const scrollHandlerRef = useRef(null);

  useEffect(() => {
    scrollHandlerRef.current = () => {
      setScrollPosition(window.scrollY);
    };

    window.addEventListener('scroll', scrollHandlerRef.current);

    return () => {
      if (scrollHandlerRef.current) {
        window.removeEventListener('scroll', scrollHandlerRef.current);
      }
    };
  }, []);

  return <div>スクロール位置: {scrollPosition}px</div>;
}
useStateとの使い分けの注意点
| 特徴 | useState | useRef |
|---|---|---|
| 再レンダリング | 値の変更で発生 | 値の変更では発生しない |
| 用途 | UI表示に関わる状態 | UI表示に関わらない値の保持 |
| 更新方法 | setter関数 | .currentプロパティへの直接代入 |
| 初期化 | 毎回実行される | 一度だけ実行 |
使い分けの指針:
function ComponentExample() {
  // ✅ UI表示に影響する値 → useState
  const [userName, setUserName] = useState('');
  const [isLoading, setIsLoading] = useState(false);

  // ✅ UI表示に影響しない値 → useRef
  const apiCallCountRef = useRef(0);
  const previousValueRef = useRef('');
  const timerIdRef = useRef(null);

  const handleSubmit = () => {
    apiCallCountRef.current += 1; // ログ用、画面表示には影響しない
    previousValueRef.current = userName; // 前回値の記録

    setIsLoading(true); // UIに反映される

    // API呼び出し処理...
  };

  return (
    <form onSubmit={handleSubmit}>
      <input
        value={userName}
        onChange={(e) => setUserName(e.target.value)}
      />
      <button type="submit" disabled={isLoading}>
        {isLoading ? '送信中...' : '送信'}
      </button>
    </form>
  );
}
注意すべき点
1. useRefは「グローバル変数の代替」ではない
useRefはコンポーネント内でのみ有効であり、他のコンポーネントからは直接アクセスできません。真のグローバル状態が必要な場合は、Context APIやReduxなどを使用してください。
2. 値の変更タイミングに注意
function RefUpdateTiming() {
  const countRef = useRef(0);
  const [, forceRender] = useState({});

  const handleClick = () => {
    countRef.current += 1;

    // ⚠️ この時点ではまだ画面は更新されていない
    console.log('Updated ref:', countRef.current);

    // 画面更新を強制する場合
    forceRender({});
  };

  return (
    <div>
      <p>Count: {countRef.current}</p>
      <button onClick={handleClick}>増加</button>
    </div>
  );
}
これらの3つの基本手法を理解することで、React アプリケーションでのグローバル状態管理の基礎を身につけることができます。次のセクションでは、これらの手法をより実践的で安全に使用するためのテクニックについて詳しく解説していきます。

グローバル変数管理の実践テクニックと安全な設計手法
基本的なグローバル状態管理手法を理解したところで、実際のプロダクション環境で安全かつ効率的に運用するための実践テクニックを学んでいきましょう。このセクションでは、TypeScriptを活用した型安全性の確保、ブラウザストレージとの連携、そして開発中によく遭遇するトラブルの解決法について詳しく解説します。
TypeScriptで型安全なグローバル変数管理(useContext, useState, useRef)
なぜTypeScriptでの型安全性が重要なのか
TypeScriptを使用することで、以下のメリットが得られます:
- コンパイル時エラーの検出: 実行前に型の不整合を発見
- IDEでの強力な補完機能: 開発効率の向上
- リファクタリングの安全性: 大規模な変更時の信頼性向上
- チーム開発での型情報共有: 他の開発者との認識合わせ
Context APIの型安全な実装
まず、ユーザー認証を例にしたContext APIの型安全な実装を見てみましょう:
import React, { createContext, useContext, useState, ReactNode } from 'react';

// ユーザー情報の型定義
interface User {
  id: number;
  name: string;
  email: string;
  role: 'admin' | 'user' | 'guest';
}

// 認証状態の型定義
interface AuthState {
  user: User | null;
  isAuthenticated: boolean;
  isLoading: boolean;
}

// 認証コンテキストの値の型定義
interface AuthContextType {
  // 状態
  authState: AuthState;
  // アクション
  login: (email: string, password: string) => Promise<void>;
  logout: () => void;
  updateUser: (userData: Partial<User>) => void;
}

// コンテキストの作成(初期値はundefined)
const AuthContext = createContext<AuthContextType | undefined>(undefined);

// カスタムフック:型安全なuseAuthの実装
export function useAuth(): AuthContextType {
  const context = useContext(AuthContext);

  if (context === undefined) {
    throw new Error('useAuthはAuthProvider内で使用してください');
  }

  return context;
}

// AuthProviderのpropsの型定義
interface AuthProviderProps {
  children: ReactNode;
}

// AuthProviderコンポーネント
export function AuthProvider({ children }: AuthProviderProps) {
  const [authState, setAuthState] = useState<AuthState>({
    user: null,
    isAuthenticated: false,
    isLoading: false
  });

  const login = async (email: string, password: string): Promise<void> => {
    setAuthState(prev => ({ ...prev, isLoading: true }));

    try {
      // API呼び出しの型安全な実装
      const response = await fetch('/api/login', {
        method: 'POST',
        headers: {
          'Content-Type': 'application/json',
        },
        body: JSON.stringify({ email, password }),
      });

      if (!response.ok) {
        throw new Error('ログインに失敗しました');
      }

      const userData: User = await response.json();

      setAuthState({
        user: userData,
        isAuthenticated: true,
        isLoading: false
      });
    } catch (error) {
      setAuthState({
        user: null,
        isAuthenticated: false,
        isLoading: false
      });
      throw error;
    }
  };

  const logout = (): void => {
    setAuthState({
      user: null,
      isAuthenticated: false,
      isLoading: false
    });
  };

  const updateUser = (userData: Partial<User>): void => {
    setAuthState(prev => ({
      ...prev,
      user: prev.user ? { ...prev.user, ...userData } : null
    }));
  };

  const value: AuthContextType = {
    authState,
    login,
    logout,
    updateUser
  };

  return (
    <AuthContext.Provider value={value}>
      {children}
    </AuthContext.Provider>
  );
}
useStateの型安全な活用
import React, { useState } from 'react';

// ショッピングカートアイテムの型定義
interface CartItem {
  id: number;
  name: string;
  price: number;
  quantity: number;
  category: 'electronics' | 'clothing' | 'books' | 'food';
}

// カート状態の型定義
interface CartState {
  items: CartItem[];
  totalAmount: number;
  totalItems: number;
  discountCode?: string;
}

function ShoppingCart() {
  // 型安全なuseStateの使用
  const [cartState, setCartState] = useState<CartState>({
    items: [],
    totalAmount: 0,
    totalItems: 0
  });

  // 型安全なアイテム追加関数
  const addItem = (newItem: Omit<CartItem, 'quantity'>): void => {
    setCartState(prevState => {
      const existingItemIndex = prevState.items.findIndex(
        item => item.id === newItem.id
      );

      let updatedItems: CartItem[];

      if (existingItemIndex >= 0) {
        // 既存アイテムの数量を更新
        updatedItems = prevState.items.map((item, index) =>
          index === existingItemIndex
            ? { ...item, quantity: item.quantity + 1 }
            : item
        );
      } else {
        // 新しいアイテムを追加
        updatedItems = [...prevState.items, { ...newItem, quantity: 1 }];
      }

      // 合計値の再計算
      const totalAmount = updatedItems.reduce(
        (sum, item) => sum + (item.price * item.quantity),
        0
      );
      const totalItems = updatedItems.reduce(
        (sum, item) => sum + item.quantity,
        0
      );

      return {
        ...prevState,
        items: updatedItems,
        totalAmount,
        totalItems
      };
    });
  };

  // 型安全な数量更新関数
  const updateQuantity = (itemId: number, newQuantity: number): void => {
    if (newQuantity < 0) return;

    setCartState(prevState => {
      const updatedItems = newQuantity === 0
        ? prevState.items.filter(item => item.id !== itemId)
        : prevState.items.map(item =>
            item.id === itemId
              ? { ...item, quantity: newQuantity }
              : item
          );

      const totalAmount = updatedItems.reduce(
        (sum, item) => sum + (item.price * item.quantity),
        0
      );
      const totalItems = updatedItems.reduce(
        (sum, item) => sum + item.quantity,
        0
      );

      return {
        ...prevState,
        items: updatedItems,
        totalAmount,
        totalItems
      };
    });
  };

  return (
    <div>
      <h2>ショッピングカート</h2>
      <p>商品数: {cartState.totalItems}</p>
      <p>合計金額: ¥{cartState.totalAmount.toLocaleString()}</p>
      {/* カートアイテムの表示... */}
    </div>
  );
}
useRefの型安全な実装
import React, { useRef, useEffect, useState } from 'react';

// タイマー状態の型定義
interface TimerState {
  seconds: number;
  isRunning: boolean;
}

// タイマー設定の型定義
interface TimerConfig {
  interval: number;
  autoStart: boolean;
  maxSeconds?: number;
}

function TypeSafeTimer({ interval = 1000, autoStart = false, maxSeconds }: TimerConfig) {
  const [timerState, setTimerState] = useState<TimerState>({
    seconds: 0,
    isRunning: false
  });

  // タイマーIDの型安全な管理
  const timerIdRef = useRef<NodeJS.Timeout | null>(null);

  // 前回の秒数を保持(型安全)
  const prevSecondsRef = useRef<number>(0);

  // コールバック関数のrefを型安全に管理
  const onTickRef = useRef<((seconds: number) => void) | null>(null);

  const startTimer = (): void => {
    if (timerState.isRunning) return;

    setTimerState(prev => ({ ...prev, isRunning: true }));

    timerIdRef.current = setInterval(() => {
      setTimerState(prev => {
        const newSeconds = prev.seconds + 1;

        // 最大秒数チェック(型安全)
        if (maxSeconds && newSeconds >= maxSeconds) {
          stopTimer();
          return { ...prev, seconds: maxSeconds };
        }

        // コールバック実行(型安全)
        if (onTickRef.current) {
          onTickRef.current(newSeconds);
        }

        return { ...prev, seconds: newSeconds };
      });
    }, interval);
  };

  const stopTimer = (): void => {
    if (timerIdRef.current) {
      clearInterval(timerIdRef.current);
      timerIdRef.current = null;
    }
    setTimerState(prev => ({ ...prev, isRunning: false }));
  };

  const resetTimer = (): void => {
    stopTimer();
    prevSecondsRef.current = timerState.seconds;
    setTimerState({ seconds: 0, isRunning: false });
  };

  // コールバック設定用メソッド(型安全)
  const setOnTick = (callback: (seconds: number) => void): void => {
    onTickRef.current = callback;
  };

  // 自動開始の処理
  useEffect(() => {
    if (autoStart) {
      startTimer();
    }

    // クリーンアップ
    return () => {
      if (timerIdRef.current) {
        clearInterval(timerIdRef.current);
      }
    };
  }, []);

  return (
    <div>
      <h3>タイマー: {timerState.seconds}秒</h3>
      <p>前回の値: {prevSecondsRef.current}秒</p>
      <button onClick={startTimer} disabled={timerState.isRunning}>
        開始
      </button>
      <button onClick={stopTimer} disabled={!timerState.isRunning}>
        停止
      </button>
      <button onClick={resetTimer}>
        リセット
      </button>
    </div>
  );
}
ローカルストレージ・セッション・windowとの連携方法
ブラウザストレージの特性比較
| ストレージ | 永続性 | スコープ | 容量制限 | 適用例 |
|---|---|---|---|---|
| localStorage | ブラウザを閉じても保持 | オリジン全体 | 5-10MB | ユーザー設定、認証トークン |
| sessionStorage | タブを閉じると削除 | タブ単位 | 5-10MB | 一時的な状態、フォーム入力 |
| window | ページリロードで削除 | グローバル | メモリ依存 | 一時的なグローバル変数 |
localStorage との型安全な連携
import React, { useState, useEffect, useContext, createContext, ReactNode } from 'react';

// ユーザー設定の型定義
interface UserSettings {
  theme: 'light' | 'dark' | 'auto';
  language: 'ja' | 'en' | 'zh';
  fontSize: 'small' | 'medium' | 'large';
  notifications: {
    email: boolean;
    push: boolean;
    sms: boolean;
  };
}

// デフォルト設定
const defaultSettings: UserSettings = {
  theme: 'light',
  language: 'ja',
  fontSize: 'medium',
  notifications: {
    email: true,
    push: true,
    sms: false
  }
};

// ローカルストレージのキー
const SETTINGS_STORAGE_KEY = 'userSettings';

// 型安全なローカルストレージユーティリティ
class TypeSafeLocalStorage {
  static get<T>(key: string, defaultValue: T): T {
    try {
      const item = localStorage.getItem(key);
      return item ? JSON.parse(item) : defaultValue;
    } catch (error) {
      console.error(`Error reading from localStorage:`, error);
      return defaultValue;
    }
  }

  static set<T>(key: string, value: T): void {
    try {
      localStorage.setItem(key, JSON.stringify(value));
    } catch (error) {
      console.error(`Error writing to localStorage:`, error);
    }
  }

  static remove(key: string): void {
    try {
      localStorage.removeItem(key);
    } catch (error) {
      console.error(`Error removing from localStorage:`, error);
    }
  }
}

// 設定コンテキストの型定義
interface SettingsContextType {
  settings: UserSettings;
  updateSettings: (newSettings: Partial<UserSettings>) => void;
  resetSettings: () => void;
}

const SettingsContext = createContext<SettingsContextType | undefined>(undefined);

export function useSettings(): SettingsContextType {
  const context = useContext(SettingsContext);
  if (!context) {
    throw new Error('useSettingsはSettingsProvider内で使用してください');
  }
  return context;
}

interface SettingsProviderProps {
  children: ReactNode;
}

export function SettingsProvider({ children }: SettingsProviderProps) {
  const [settings, setSettings] = useState<UserSettings>(() => {
    // 初期化時にローカルストレージから読み込み
    return TypeSafeLocalStorage.get(SETTINGS_STORAGE_KEY, defaultSettings);
  });

  // 設定更新時にローカルストレージに保存
  const updateSettings = (newSettings: Partial<UserSettings>): void => {
    setSettings(prevSettings => {
      const updatedSettings: UserSettings = {
        ...prevSettings,
        ...newSettings,
        // ネストしたオブジェクトの適切なマージ
        notifications: {
          ...prevSettings.notifications,
          ...(newSettings.notifications || {})
        }
      };

      // ローカルストレージに保存
      TypeSafeLocalStorage.set(SETTINGS_STORAGE_KEY, updatedSettings);

      return updatedSettings;
    });
  };

  const resetSettings = (): void => {
    setSettings(defaultSettings);
    TypeSafeLocalStorage.set(SETTINGS_STORAGE_KEY, defaultSettings);
  };

  const value: SettingsContextType = {
    settings,
    updateSettings,
    resetSettings
  };

  return (
    <SettingsContext.Provider value={value}>
      {children}
    </SettingsContext.Provider>
  );
}

sessionStorage との連携パターン
import React, { useState, useEffect } from 'react';

// フォーム一時保存の型定義
interface FormDraft {
  title: string;
  content: string;
  category: string;
  tags: string[];
  lastSaved: string;
}

// セッションストレージ管理フック
function useSessionStorage<T>(key: string, initialValue: T) {
  const [storedValue, setStoredValue] = useState<T>(() => {
    try {
      const item = sessionStorage.getItem(key);
      return item ? JSON.parse(item) : initialValue;
    } catch (error) {
      console.error(`Error reading from sessionStorage:`, error);
      return initialValue;
    }
  });

  const setValue = (value: T | ((val: T) => T)): void => {
    try {
      const valueToStore = value instanceof Function ? value(storedValue) : value;
      setStoredValue(valueToStore);
      sessionStorage.setItem(key, JSON.stringify(valueToStore));
    } catch (error) {
      console.error(`Error writing to sessionStorage:`, error);
    }
  };

  const removeValue = (): void => {
    try {
      sessionStorage.removeItem(key);
      setStoredValue(initialValue);
    } catch (error) {
      console.error(`Error removing from sessionStorage:`, error);
    }
  };

  return [storedValue, setValue, removeValue] as const;
}

// フォーム一時保存コンポーネント
function DraftEditor() {
  const [formDraft, setFormDraft, removeDraft] = useSessionStorage<FormDraft>('formDraft', {
    title: '',
    content: '',
    category: '',
    tags: [],
    lastSaved: ''
  });

  // 自動保存機能
  useEffect(() => {
    const autoSaveInterval = setInterval(() => {
      if (formDraft.title || formDraft.content) {
        setFormDraft(prev => ({
          ...prev,
          lastSaved: new Date().toISOString()
        }));
      }
    }, 10000); // 10秒ごとに自動保存

    return () => clearInterval(autoSaveInterval);
  }, [formDraft.title, formDraft.content, setFormDraft]);

  const handleSubmit = (): void => {
    // フォーム送信処理
    console.log('フォーム送信:', formDraft);
    // 送信後はドラフトを削除
    removeDraft();
  };

  return (
    <form>
      <input
        type="text"
        placeholder="タイトル"
        value={formDraft.title}
        onChange={(e) => setFormDraft(prev => ({ ...prev, title: e.target.value }))}
      />
      <textarea
        placeholder="内容"
        value={formDraft.content}
        onChange={(e) => setFormDraft(prev => ({ ...prev, content: e.target.value }))}
      />
      {formDraft.lastSaved && (
        <p>最終保存: {new Date(formDraft.lastSaved).toLocaleString()}</p>
      )}
      <button type="button" onClick={handleSubmit}>
        送信
      </button>
    </form>
  );
}
window オブジェクトの適切な管理
windowオブジェクトの直接使用はアンチパターンですが、必要な場合は以下のようにラップしてリスクを軽減できます:
// グローバル変数管理の安全なラッパー
class SafeGlobalManager {
  private static readonly NAMESPACE = '__myApp__';

  // 型安全なグローバル変数の取得
  static get<T>(key: string, defaultValue: T): T {
    try {
      const globalObj = (window as any)[this.NAMESPACE] || {};
      return globalObj[key] !== undefined ? globalObj[key] : defaultValue;
    } catch (error) {
      console.error('Error accessing global variable:', error);
      return defaultValue;
    }
  }

  // 型安全なグローバル変数の設定
  static set<T>(key: string, value: T): void {
    try {
      if (!(window as any)[this.NAMESPACE]) {
        (window as any)[this.NAMESPACE] = {};
      }
      (window as any)[this.NAMESPACE][key] = value;
    } catch (error) {
      console.error('Error setting global variable:', error);
    }
  }

  // グローバル変数の削除
  static remove(key: string): void {
    try {
      if ((window as any)[this.NAMESPACE]) {
        delete (window as any)[this.NAMESPACE][key];
      }
    } catch (error) {
      console.error('Error removing global variable:', error);
    }
  }

  // SSRチェック
  static isClientSide(): boolean {
    return typeof window !== 'undefined';
  }
}

// 使用例
function GlobalStateExample() {
  const [debugMode, setDebugMode] = useState<boolean>(() => {
    if (SafeGlobalManager.isClientSide()) {
      return SafeGlobalManager.get('debugMode', false);
    }
    return false;
  });

  const toggleDebugMode = (): void => {
    const newDebugMode = !debugMode;
    setDebugMode(newDebugMode);

    if (SafeGlobalManager.isClientSide()) {
      SafeGlobalManager.set('debugMode', newDebugMode);
    }
  };

  return (
    <div>
      <label>
        <input
          type="checkbox"
          checked={debugMode}
          onChange={toggleDebugMode}
        />
        デバッグモード
      </label>
      {debugMode && <div>デバッグ情報が表示されます</div>}
    </div>
  );
}
デバッグの落とし穴とトラブルシューティング:遅延・更新されない問題の対処法
よくある問題と解決策
1. 状態が更新されない問題
問題: Context の値を更新しても画面に反映されない
// ❌ 問題のあるコード
function ProblemProvider({ children }: { children: ReactNode }) {
  const [user, setUser] = useState({ name: 'John' });

  const updateUser = (newName: string) => {
    // オブジェクトの参照が変わらないため、再レンダリングが発生しない
    user.name = newName;
    setUser(user);
  };

  return (
    <UserContext.Provider value={{ user, updateUser }}>
      {children}
    </UserContext.Provider>
  );
}

// ✅ 修正されたコード
function FixedProvider({ children }: { children: ReactNode }) {
  const [user, setUser] = useState({ name: 'John' });

  const updateUser = (newName: string) => {
    // 新しいオブジェクトを作成して状態を更新
    setUser(prevUser => ({ ...prevUser, name: newName }));
  };

  return (
    <UserContext.Provider value={{ user, updateUser }}>
      {children}
    </UserContext.Provider>
  );
}
2. 意図しない再レンダリングの最適化
問題: Context の値が変わると、消費する全てのコンポーネントが再レンダリングされる
// ❌ 毎回新しいオブジェクトが作成される
function InefficiентProvider({ children }: { children: ReactNode }) {
  const [user, setUser] = useState({ name: 'John', age: 25 });

  return (
    <UserContext.Provider value={{ user, setUser }}>
      {children}
    </UserContext.Provider>
  );
}

// ✅ useMemoで最適化
function OptimizedProvider({ children }: { children: ReactNode }) {
  const [user, setUser] = useState({ name: 'John', age: 25 });

  const contextValue = useMemo(() => ({
    user,
    setUser
  }), [user]);

  return (
    <UserContext.Provider value={contextValue}>
      {children}
    </UserContext.Provider>
  );
}

// ✅ さらなる最適化:コンポーネント分離
const UserDisplayComponent = React.memo(function UserDisplay() {
  const { user } = useUser();
  console.log('UserDisplay re-rendered'); // デバッグ用

  return <div>{user.name} ({user.age}歳)</div>;
});

const UserControlComponent = React.memo(function UserControl() {
  const { setUser } = useUser();
  console.log('UserControl re-rendered'); // デバッグ用

  const handleUpdateAge = useCallback(() => {
    setUser(prev => ({ ...prev, age: prev.age + 1 }));
  }, [setUser]);

  return <button onClick={handleUpdateAge}>年齢を増やす</button>;
});
3. 非同期処理での状態更新遅延
問題: 非同期処理中の状態更新が期待通りに動作しない
// ❌ 問題のあるコード
function ProblematicAsyncUpdate() {
  const [count, setCount] = useState(0);

  const handleMultipleUpdates = async () => {
    // 複数の非同期処理が同時に走る場合の問題
    setTimeout(() => setCount(count + 1), 100);
    setTimeout(() => setCount(count + 1), 200);
    setTimeout(() => setCount(count + 1), 300);
    // 結果: count は 1 になる(期待値は 3)
  };

  return (
    <div>
      <p>Count: {count}</p>
      <button onClick={handleMultipleUpdates}>更新</button>
    </div>
  );
}

// ✅ 関数形式の更新で修正
function FixedAsyncUpdate() {
  const [count, setCount] = useState(0);

  const handleMultipleUpdates = async () => {
    // 前の状態を参照する関数形式を使用
    setTimeout(() => setCount(prev => prev + 1), 100);
    setTimeout(() => setCount(prev => prev + 1), 200);
    setTimeout(() => setCount(prev => prev + 1), 300);
    // 結果: count は正しく 3 になる
  };

  return (
    <div>
      <p>Count: {count}</p>
      <button onClick={handleMultipleUpdates}>更新</button>
    </div>
  );
}
デバッグツールの効果的な活用
1. React Developer Tools の活用
// デバッグ用のカスタムフック
function useDebugValue(value: any, label: string) {
  // React Developer Tools で値を確認できる
  React.useDebugValue(value, (val) => `${label}: ${JSON.stringify(val)}`);
  return value;
}

function DebuggableComponent() {
  const [state, setState] = useState({ count: 0, name: 'test' });

  // Developer Tools でラベル付きで表示される
  useDebugValue(state, 'Component State');

  return (
    <div>
      <p>Count: {state.count}</p>
      <button onClick={() => setState(prev => ({ ...prev, count: prev.count + 1 }))}>
        増加
      </button>
    </div>
  );
}

2. カスタムログ出力システム
// 開発用ログシステム
class DevLogger {
  private static isEnabled = process.env.NODE_ENV === 'development';

  static stateChange(componentName: string, oldState: any, newState: any): void {
    if (!this.isEnabled) return;

    console.group(`🔄 ${componentName} State Change`);
    console.log('Previous:', oldState);
    console.log('Current:', newState);
    console.log('Changed:', this.getChangedProperties(oldState, newState));
    console.groupEnd();
  }

  static contextUpdate(contextName: string, value: any): void {
    if (!this.isEnabled) return;

    console.log(`📡 ${contextName} Context Updated:`, value);
  }

  private static getChangedProperties(oldObj: any, newObj: any): Record<string, any> {
    const changes: Record<string, any> = {};

    for (const key in newObj) {
      if (oldObj[key] !== newObj[key]) {
        changes[key] = { from: oldObj[key], to: newObj[key] };
      }
    }

    return changes;
  }
}

// 使用例
function LoggingProvider({ children }: { children: ReactNode }) {
  const [state, setState] = useState({ user: null, theme: 'light' });

  const updateState = useCallback((newState: any) => {
    setState(prevState => {
      DevLogger.stateChange('UserProvider', prevState, newState);
      return newState;
    });
  }, []);

  const contextValue = useMemo(() => {
    DevLogger.contextUpdate('UserProvider', { state, updateState });
    return { state, updateState };
  }, [state, updateState]);

  return (
    <UserContext.Provider value={contextValue}>
      {children}
    </UserContext.Provider>
  );
}
3. パフォーマンス監視カスタムフック
import { useEffect, useRef } from 'react';

// レンダリング回数を追跡するフック
function useRenderCount(componentName: string) {
  const renderCount = useRef(0);

  useEffect(() => {
    renderCount.current += 1;
    console.log(`🎨 ${componentName} rendered ${renderCount.current} times`);
  });

  return renderCount.current;
}

// 状態変更の頻度を監視するフック
function useStateChangeFrequency(state: any, componentName: string) {
  const lastChangeTime = useRef<number>(Date.now());
  const changeCount = useRef<number>(0);

  useEffect(() => {
    const now = Date.now();
    const timeSinceLastChange = now - lastChangeTime.current;
    changeCount.current += 1;

    if (timeSinceLastChange < 100) {
      console.warn(
        `⚠️ ${componentName}: 状態変更が頻繁です (${timeSinceLastChange}ms間隔, ${changeCount.current}回目)`
      );
    }

    lastChangeTime.current = now;
  }, [state, componentName]);
}

// 使用例
function MonitoredComponent() {
  const [count, setCount] = useState(0);
  const renderCount = useRenderCount('MonitoredComponent');

  useStateChangeFrequency(count, 'MonitoredComponent');

  return (
    <div>
      <p>Count: {count} (Rendered: {renderCount} times)</p>
      <button onClick={() => setCount(prev => prev + 1)}>
        増加
      </button>
    </div>
  );
}
4. メモリリーク検出と予防
// メモリリーク検出用のフック
function useMemoryLeakDetection(componentName: string) {
  const mountTime = useRef<number>(Date.now());
  const timersRef = useRef<Set<NodeJS.Timeout>>(new Set());
  const intervalsRef = useRef<Set<NodeJS.Timeout>>(new Set());

  // 安全なsetTimeout
  const safeSetTimeout = useCallback((callback: () => void, delay: number) => {
    const timerId = setTimeout(() => {
      callback();
      timersRef.current.delete(timerId);
    }, delay);

    timersRef.current.add(timerId);
    return timerId;
  }, []);

  // 安全なsetInterval
  const safeSetInterval = useCallback((callback: () => void, interval: number) => {
    const intervalId = setInterval(callback, interval);
    intervalsRef.current.add(intervalId);
    return intervalId;
  }, []);

  // クリーンアップ
  useEffect(() => {
    return () => {
      const lifeTime = Date.now() - mountTime.current;

      // 長時間生存していた場合の警告
      if (lifeTime > 300000) { // 5分以上
        console.warn(`⚠️ ${componentName}: 長時間マウントされていました (${lifeTime}ms)`);
      }

      // タイマーのクリーンアップ
      timersRef.current.forEach(timerId => clearTimeout(timerId));
      intervalsRef.current.forEach(intervalId => clearInterval(intervalId));

      if (timersRef.current.size > 0 || intervalsRef.current.size > 0) {
        console.warn(`🧹 ${componentName}: ${timersRef.current.size + intervalsRef.current.size}個のタイマーをクリーンアップしました`);
      }
    };
  }, [componentName]);

  return { safeSetTimeout, safeSetInterval };
}
実践的なトラブルシューティングチェックリスト
開発中に問題が発生した場合、以下のチェックリストを活用してください:
状態が更新されない場合
パフォーマンスが悪い場合
メモリリークの疑いがある場合
エラーバウンダリを使用したグローバル状態の保護
import React, { Component, ErrorInfo, ReactNode } from 'react';

interface ErrorBoundaryState {
  hasError: boolean;
  error?: Error;
  errorInfo?: ErrorInfo;
}

interface ErrorBoundaryProps {
  children: ReactNode;
  fallback?: ReactNode;
  onError?: (error: Error, errorInfo: ErrorInfo) => void;
}

class GlobalStateErrorBoundary extends Component<ErrorBoundaryProps, ErrorBoundaryState> {
  constructor(props: ErrorBoundaryProps) {
    super(props);
    this.state = { hasError: false };
  }

  static getDerivedStateFromError(error: Error): ErrorBoundaryState {
    return {
      hasError: true,
      error
    };
  }

  componentDidCatch(error: Error, errorInfo: ErrorInfo) {
    this.setState({
      error,
      errorInfo
    });

    // エラーログの送信
    if (this.props.onError) {
      this.props.onError(error, errorInfo);
    }

    // 開発環境でのデバッグ情報
    if (process.env.NODE_ENV === 'development') {
      console.group('🚨 Global State Error');
      console.error('Error:', error);
      console.error('Error Info:', errorInfo);
      console.groupEnd();
    }
  }

  render() {
    if (this.state.hasError) {
      return this.props.fallback || (
        <div style={{ padding: '20px', backgroundColor: '#fee', border: '1px solid #f00' }}>
          <h2>グローバル状態でエラーが発生しました</h2>
          <p>ページを再読み込みしてください。</p>
          {process.env.NODE_ENV === 'development' && (
            <details>
              <summary>エラー詳細(開発環境のみ)</summary>
              <pre>{this.state.error?.toString()}</pre>
              <pre>{this.state.errorInfo?.componentStack}</pre>
            </details>
          )}
        </div>
      );
    }

    return this.props.children;
  }
}

// 使用例
function App() {
  return (
    <GlobalStateErrorBoundary
      onError={(error, errorInfo) => {
        // エラー監視サービスに送信
        console.error('Global state error:', error, errorInfo);
      }}
    >
      <AuthProvider>
        <SettingsProvider>
          <CartProvider>
            <MainApplication />
          </CartProvider>
        </SettingsProvider>
      </AuthProvider>
    </GlobalStateErrorBoundary>
  );
}
このセクションで紹介した実践テクニックを活用することで、React アプリケーションでのグローバル状態管理をより安全で効率的に行うことができます。TypeScript による型安全性の確保、ブラウザストレージとの適切な連携、そして効果的なデバッグ手法を身につけることで、保守性の高いアプリケーションを構築できるでしょう。
よくある質問
-
Redux、Zustand、Recoilなどの状態管理ライブラリはいつ使うべき?
-
Context APIやuseStateで十分なケースが多いですが、以下の条件に当てはまる場合は専用ライブラリの検討をおすすめします。
Reduxを選ぶべき場面:
- 大規模チーム開発で状態の変更履歴やデバッグが重要
- 複雑なビジネスロジックを含む状態操作が多数存在
- Time Travel DebuggingやHot Reloadingが必要
Zustandを選ぶべき場面:
- Reduxより軽量で学習コストを抑えたい
- TypeScriptとの相性を重視
- 小〜中規模アプリで最小限の設定で済ませたい
Recoilを選ぶべき場面:
- 状態間の依存関係が複雑(derived state)
- 非同期処理を含む状態管理が多い
- Facebookが開発した安定性を重視
一般的な目安として、コンポーネント数が50を超える、または5人以上の開発チームでは専用ライブラリの導入を検討しましょう。
-
Next.jsやViteなどの開発環境でグローバル変数管理に違いはある?
-
基本的なReactの状態管理手法に違いはありませんが、以下の点で注意が必要です。
Next.js(SSR環境)での注意点:
// ❌ サーバーサイドでwindowオブジェクトは存在しない
const theme = window.localStorage.getItem('theme');

// ✅ クライアントサイドでのみ実行
useEffect(() => {
  const theme = window.localStorage.getItem('theme');
  setTheme(theme);
}, []);
Vite環境での注意点:
- HMR(Hot Module Replacement)時にContext Providerが再初期化される可能性
- 開発時のコンポーネント状態保持のため、グローバル状態の初期化タイミングに注意
共通の推奨事項:
- SSR/CSRハイブリッドでの状態同期
- 環境変数(
process.env)による設定値の管理 - 開発・本番環境での状態管理の一貫性保持
-
グローバル変数の更新でパフォーマンスが悪くなった場合の対処法は?
-
Context APIを使った状態管理で最も多い問題です。以下の最適化テクニックを段階的に適用してください。
1. Contextの分割:
// ❌ 全ての状態を一つのContextに
const AppContext = createContext({ user, theme, cart, notifications });

// ✅ 関心ごとに分離
const UserContext = createContext(user);
const ThemeContext = createContext(theme);
const CartContext = createContext(cart);
2. React.memoによる再レンダリング制御:
const ExpensiveComponent = React.memo(({ data }) => {
  return <div>{/* 重い処理のコンポーネント */}</div>;
});
3. useCallbackとuseMemoの活用:
const contextValue = useMemo(() => ({
  state,
  updateState: useCallback((newState) => setState(newState), [])
}), [state]);
4. 状態更新の頻度を制御:
// debounceやthrottleを使用して更新頻度を調整
const debouncedUpdate = useCallback(
  debounce((value) => setGlobalState(value), 300),
  []
);
-
TypeScriptでContext APIを使う際の型エラーを回避するには?
-
TypeScriptでContext APIを使用する際によく発生する型エラーとその解決策をご紹介します。
問題1: createContextの初期値でのnull/undefined警告
// ❌ 型エラーが発生しやすい
const MyContext = createContext(null);

// ✅ 適切な型定義と初期値
interface MyContextType {
  user: User | null;
  setUser: (user: User | null) => void;
}

const MyContext = createContext<MyContextType>({
  user: null,
  setUser: () => {}
});
問題2: useContextでの型推論エラー
// ✅ カスタムフックでの型安全性確保
function useMyContext() {
  const context = useContext(MyContext);
  if (!context) {
    throw new Error('useMyContext must be used within MyProvider');
  }
  return context;
}
問題3: Provider配下以外での使用時の型エラー
// ✅ Providerの存在チェックを含む型定義
const MyContext = createContext<MyContextType | undefined>(undefined);

export function useMyContext(): MyContextType {
  const context = useContext(MyContext);
  if (context === undefined) {
    throw new Error('useMyContext must be used within a MyProvider');
  }
  return context;
}
-
テスト環境でグローバル状態をモックするベストプラクティスは?
-
Reactのグローバル変数をテストする際は、以下のアプローチでモックとテストの独立性を確保します。
Jest + React Testing Libraryでのテスト例:
// テスト用のProvider作成
function TestWrapper({ children, initialState = {} }) {
  return (
    <GlobalStateProvider initialState={initialState}>
      {children}
    </GlobalStateProvider>
  );
}

// テストケース
test('グローバル状態の更新をテスト', () => {
  const { getByTestId } = render(
    <TestWrapper initialState={{ count: 0 }}>
      <Counter />
    </TestWrapper>
  );

  fireEvent.click(getByTestId('increment-button'));
  expect(getByTestId('count-display')).toHaveTextContent('1');
});
モック戦略:
- テストごとに独立したProvider環境を提供
jest.mock()を使用した外部依存関係のモックbeforeEachでのグローバル状態の初期化- テスト専用のカスタムフックやヘルパー関数の作成
これらのテクニックにより、テストの信頼性と保守性が大幅に向上します。
まとめ
この記事では、Reactにおけるグローバル変数の管理について、基本概念から実践的なテクニックまで幅広く解説してきました。最初にお伝えしたいのは、Reactの「グローバル変数」とは単純な変数のことではなく、アプリケーション全体で適切に状態を管理する手法を指すということです。
多くの開発者が最初に直面するのは、propsのバケツリレーやローカル状態では解決できない複雑なデータ共有の課題です。そんな時に活躍するのがContext APIであり、useStateやuseRefといったReactの標準機能を組み合わせた状態管理パターンでした。これらの手法をマスターすることで、小〜中規模のアプリケーションなら十分に対応できるようになります。
実際の開発現場では、Redux、Zustand、Recoilといった専用ライブラリの選択肢もありますが、まずは標準のReact機能で状態管理の基礎をしっかりと理解することが重要です。特に50コンポーネント未満の規模や、5人未満のチーム開発であれば、Context APIベースの解決策で十分なケースが多いでしょう。
Next.jsのSSR環境やViteなどのモダンな開発環境では、それぞれ固有の注意点がありますが、基本的なReactの状態管理の考え方は変わりません。むしろ、これらの環境特有の制約を理解することで、より堅牢なアプリケーションを構築できるようになります。
最後に、グローバル状態管理で最も大切なのは適切な設計思想です。どのデータをグローバルに管理し、どこまでローカルに留めるかの判断基準を持つこと。そして、チーム全体でその基準を共有し、一貫性のある実装を心がけることが、長期的な保守性につながります。